This blog is slowly coming together....I sincerely thank you for your patience!
I can't decide on a background or concept for the blog just yet, so I'm still experimenting. In my experiences I learned that changing the background also meant changing the twitter buttons, font colors, signature, etc. What a hassel!
However you may have noticed a while back I learned how to add a signature on my blog posts.
I stumbled upon this website that guides you through how to add this html code. Ekk! html code? sounds scary right? It totally isn't.
The website I used it totally ugly, but I don't have a fancy computer or Mac. I googled 'add signature to blog' and alot of bloggers use fancy editing programs. I don't have photoshop or adobe or any of those pretty programs. I use Microsoft paint for most of my cropping and images. I'm sure some of you bloggers are cringing now, but I am saving up for a Mac. But until then you can google another way to use your fancy program or you can read my tutorial below!
Click here to do it on your own and read along for my directions:
Step 1 Enter your name
Step 2 Choose your font
Step 3 Choose the size
Step 4 Choose the color. I kept my background transparent so that I could revise my blog background whenever I'd like and not need to change the color of the signature box
Step 5 Set the slope I like this option because it gives the signature a little more personality, what do you think?
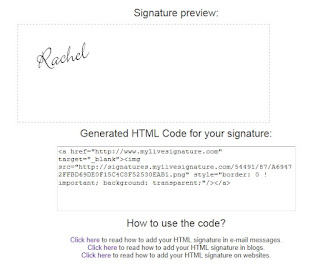
 Signature is ready! Click on 'Want to use this signature' in order to get the HTML code
Generate the HTML code
Preview Code and copy (Ctrl+C)
Log in to your blog visit Settings/Posts and Comments and insert in the post template.
Easy peasy!
Great tutorial for bloggers on how to add a custom signature to each post!
High Heels!

Labels: blog, bloggers, DIY


 Signature is ready! Click on 'Want to use this signature' in order to get the HTML code

